With all of the recent problems I’ve had from my landlord I had to take the end fed wire down and replace it with the Ciro Mazzoni Baby Loop antenna. Over the last few days myself and my father worked together to get the antenna out on the ground and wired up and I’m delighted to say it is all in and working and first impression are very positive. What follows is a review of my experience unboxing and setting up of the antenna
Here we go then, First impressions of the Ciro Mazzoni Baby Loop antenna.
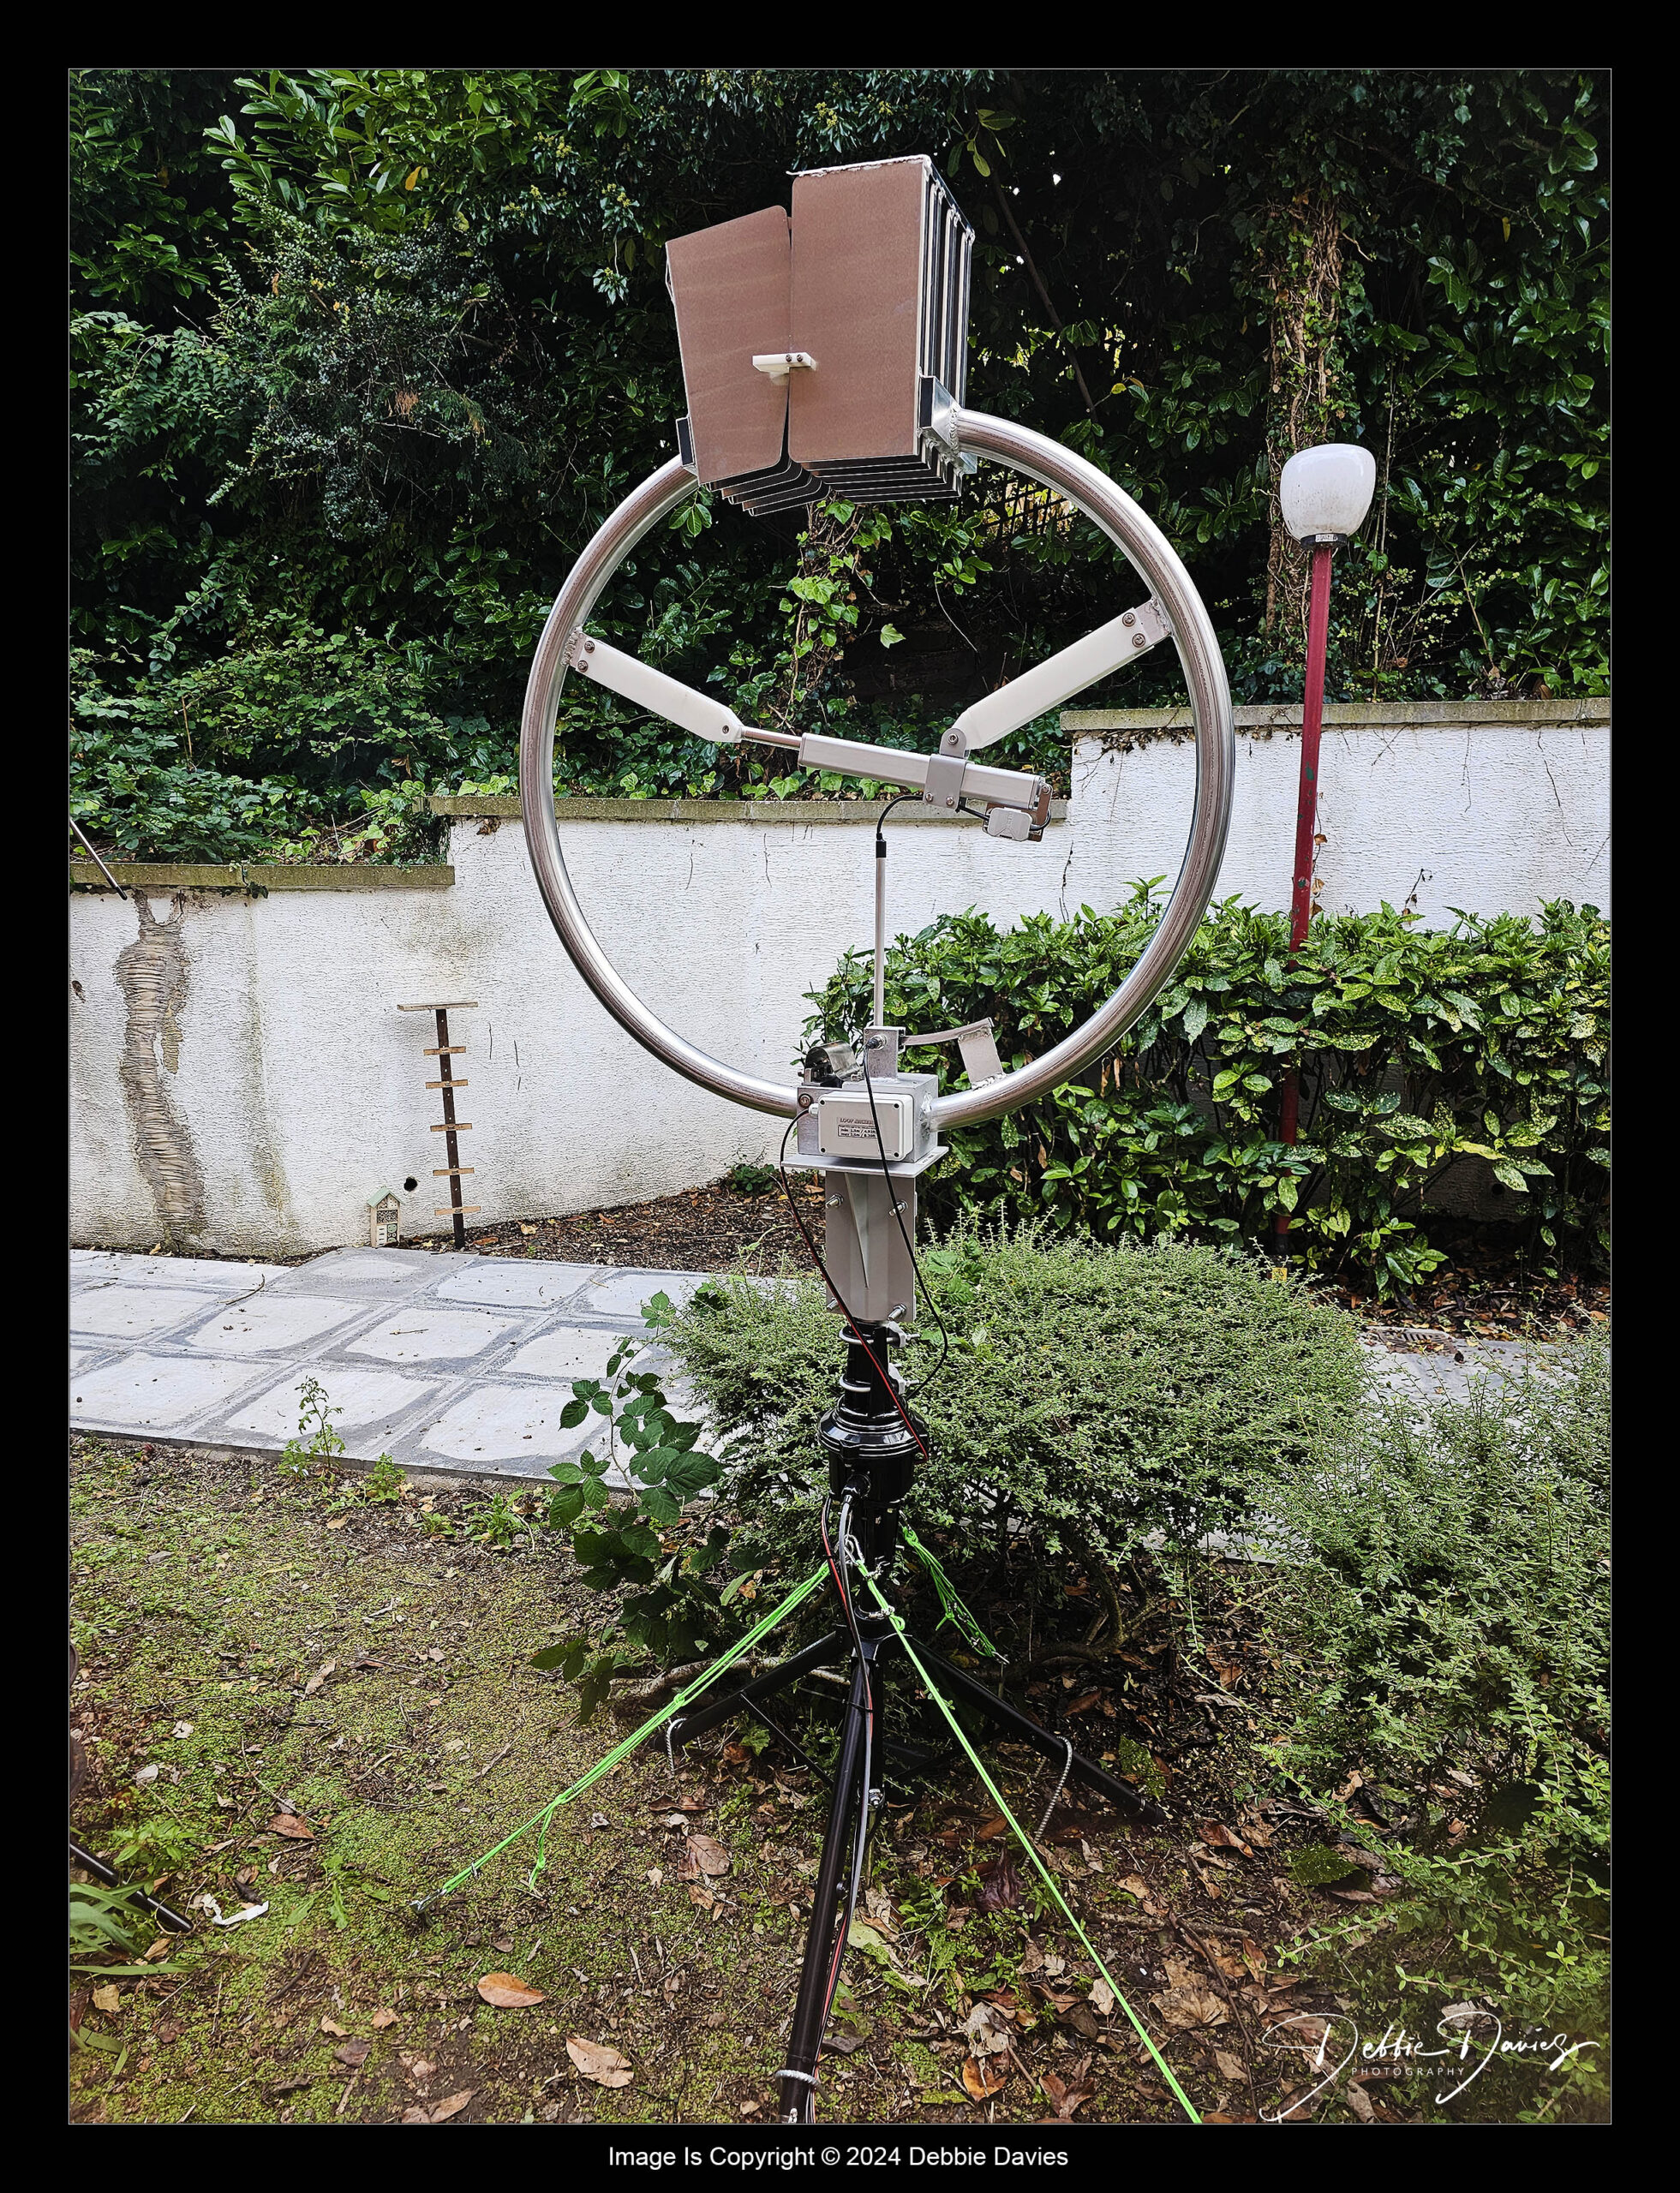
First of all it arrived last week in an absolutely masshooosive box that is now being used for my summer house! That being said it is reassuring to see that Ciro Mazzoni take that much care. In the box are the 2 halves of the loop with the capacitor, motor and other bits all attached. A steel “pole mounting” plate and all the nuts bolts and stuff you need. Finally there is the control box and power supply.
Assembly is very easy, I built it in the living room, putting one half on the tripod and bolting the other half to it. Not complicated and taking it slow and steady took less than an hour. Then took the loop off the tripod and started to assemble the Yaesu G450c rotator. Depending on how you attach/mount the rotator you may need the optional GC-038 pole mounting kit.
One thing you will need to buy separately is a 2″ (50mm) pole to link the rotator to the base plate for the loop. You can use a little small diameter poles but everything seems best suited to 2″.
Thinking about it, you will also need to buy rotator cable and a length of 30amp twin power cable as well as your coax. Don’t forget to leave extra for “rotation”.
Final assembly was done in 2 stages. The first stage I took the tripod and rotator out and placed them where the loop was going to live. I then bolted the loops mounting bracket/plate to the rotator without the loop attached. Once this was all built I levelled it and staked the feet of the tripod down using some industrial sized tent pegs made from reinforcing bar.
last operation was to drop the loop onto the mount. The loop is not heavy at just 16kg but I do recommend 2 people. It’s good to hold onto the loop while the second person puts the 4 bolts in from underneath. Once the loop was in place we added some dayglow guy ropes just to be doubly sure it doesn’t blow over and connected everything up in the shack.
I will say that the Ciro Mazzoni Baby Loop is without question made to the highest quality. It’s solid and it seems like no skimping has been made. Yes it costs a lot but you get what you pay for. I suspect this will happily sit outside for many years with minimum servicing and attention.
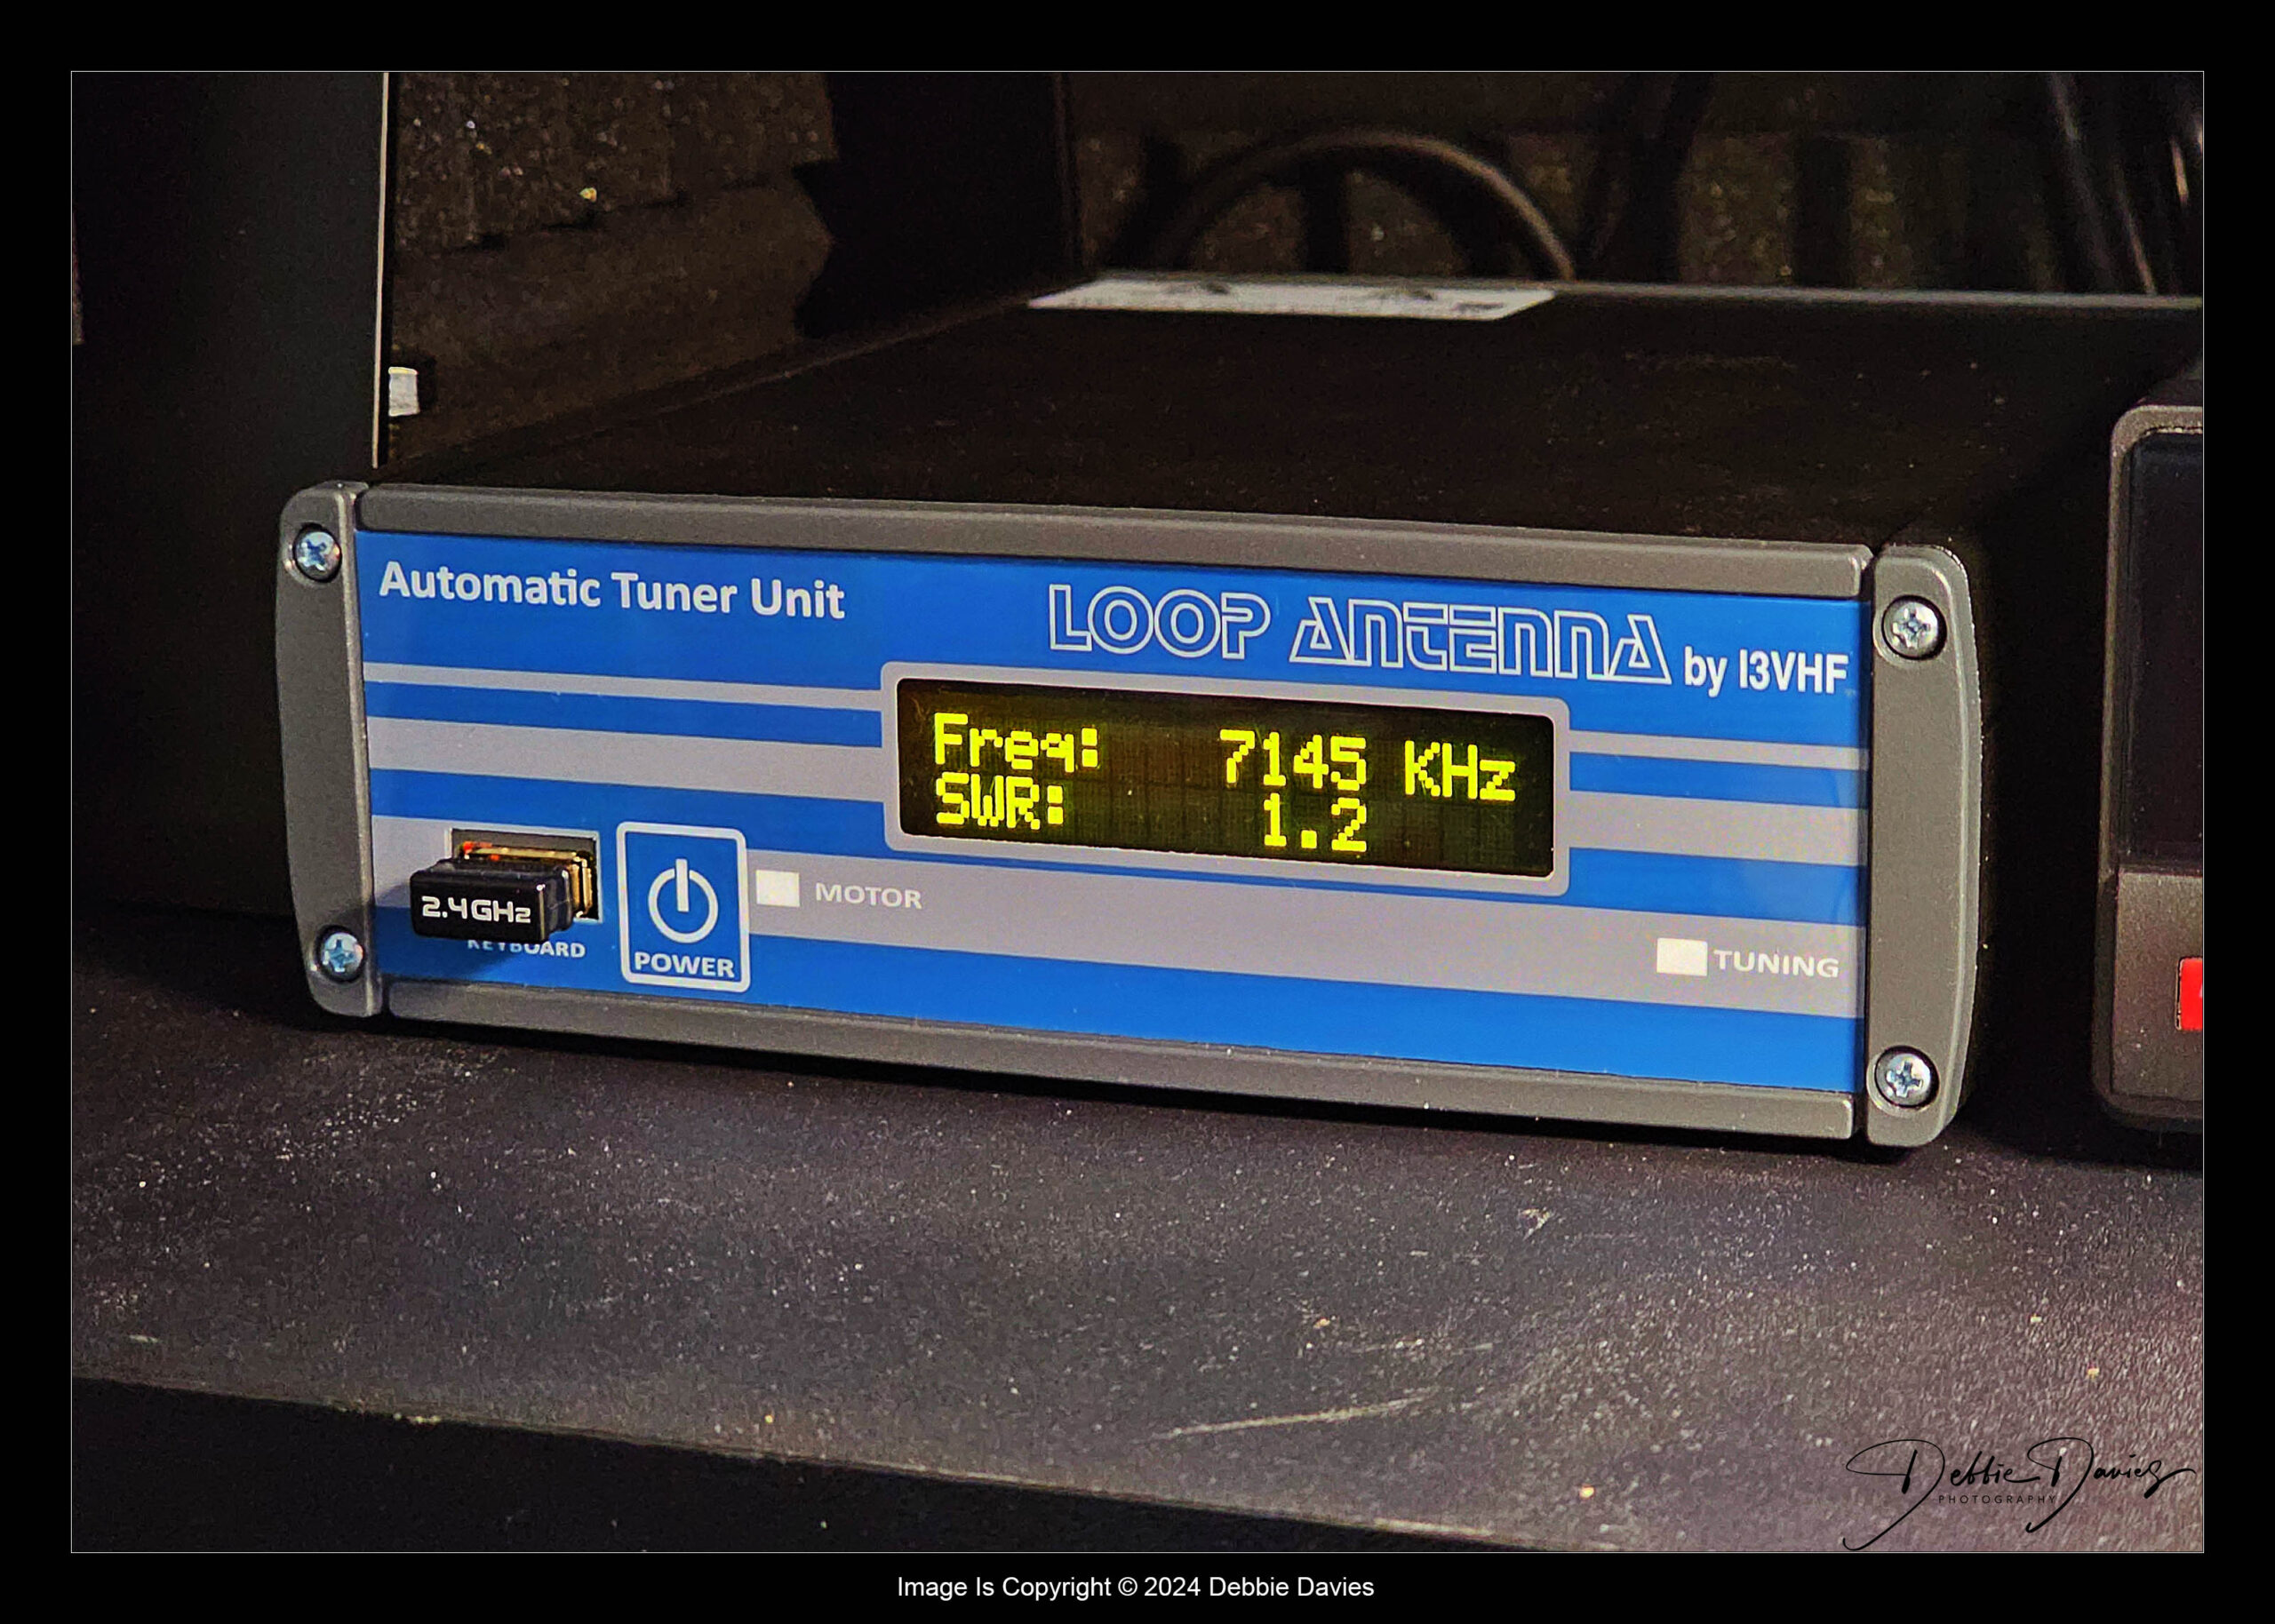
As for using the loop, early days yet and it’s VERY different to using a dipole or wire. It’s very narrow on receive (I think it’s what they call High-Q????) so you can not display the full band on your spectrum scope and expect to see signals dancing about all over it. Instead, you need to tune up the dial a bit and let the ATU catch up and then move up the band again and wait for the ATU. Different but not a showstopper. The rotator is also something that I need to factor in now when tuning through the bands!
Performance wise, I’m getting an SWR of less than 1.5:1 across all band between 40m and 10m so that’s good. I’ve had FT8 contacts all over Euroland over 2000miles away and SSB calls into Russia and Italy with very good reports so first impressions are positive.
Only change I’ve made to setup is to change the number keyboard that Ciro Mazzoni supply for one that uses a remote dongal instead of a cable. I hate cables all over my desk.
Hope this helps anyone thinking of investing in one of these monsters. From what I have seen so far I would recommend on if you are in a limited space environment like myself.